“To keep the body in good health is a duty… otherwise we shall not be able to keep our minds strong and clear.” — Buddha

This article is a quick guide to Beginner Yoga for Flexibility for readers in the United States. It explains what beginner yoga is and how it can improve your range of motion. It also shows how a simple routine at home can help reduce stiffness and improve your posture.
Beginner Yoga for Flexibility means gentle practices that work on muscles, connective tissue, and joints. This article covers easy stretches, safe poses, and tips for practicing yoga at home. It focuses on making progress slowly, not expecting quick results.
By following this guide, you can expect to feel less muscle tightness, move better, stand taller, and build foundational strength. You might start to see improvements in 4–8 weeks, depending on your starting fitness level and how often you practice.
This article is a professional overview that uses the latest research and advice from trusted sources like the American College of Sports Medicine, Yoga Alliance, and Mayo Clinic. Later sections will dive deeper into the benefits and science, what to expect, safety, warm-ups, basic poses, routines, troubleshooting, strength integration, and recommended resources.
Key Takeaways
- Beginner Yoga for Flexibility offers safe, gradual ways to improve mobility and reduce everyday stiffness.
- Simple beginner yoga routines at home can build foundational strength and better posture.
- Noticeable gains often appear in 4–8 weeks with consistent practice.
- This article draws on research and guidance from ACSM, Yoga Alliance, and Mayo Clinic.
- Emphasis is on practical, evidence-based tips for yoga for beginners and easy yoga stretches.
Why Flexibility Matters and How Yoga Helps
Flexibility is key to moving easily in our daily lives. It makes bending, reaching, and twisting simpler. It also improves posture, balance, and comfort in the lower back.
Yoga, especially for beginners, helps reduce muscle strain and tension. It does this through mindful movement.

Health and mobility benefits of improved flexibility
Being more flexible makes everyday tasks like tying shoes and lifting groceries easier. It also lowers the risk of strains in hips, hamstrings, shoulders, and the spine. This is because it supports athletic performance by reducing compensatory patterns and improving balance.
Stretching also lowers perceived tension and stress. This clears your mind for daily activities.
How yoga targets muscles, connective tissue, and joints
Yoga combines static and dynamic stretches with isometric holds. This engages muscles and soft tissue. It loads tissues gradually to encourage adaptation in muscles, tendons, ligaments, and fascia.
Breath-synchronized movement reduces guarding reflexes. This helps in safe elongation. Clear alignment cues and progressive modifications protect joints while focusing on hips, hamstrings, shoulders, and the spine.
Research and evidence supporting yoga for flexibility
Controlled trials and reviews show gains in hamstring and spine mobility with regular yoga practice. The American College of Sports Medicine sees yoga as a practical tool for improving range of motion. However, consistent practice and progressive flexibility exercises are key for the best results.
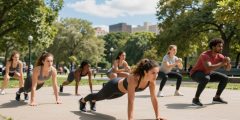
Beginner Yoga for Flexibility

Starting yoga for flexibility means setting small goals and moving gently. Your first classes will focus on breathing, simple poses, and learning how to align your body. Classes are usually short, lasting 15–30 minutes, to help you warm up safely and avoid stretching too much.
It’s normal to feel some tightness in your muscles at first. This is because your body is getting used to new movements. But if you feel sharp pain, it’s a sign to stop right away. You might feel sore the next day as your body adjusts to the new stretches.
What to expect: slow movements, gentle stretches, and lots of breathing exercises. These help prevent muscle tension. Your first yoga sequence will include poses that open your hips, stretch your hamstrings, and gently twist your spine.
Setting realistic goals helps you see how far you’ve come. Choose specific goals like touching your toes in eight weeks or feeling less back pain in four weeks. Use simple tests like sit-and-reach or squat counts to track your progress.
Keep a log of your practice. Write down how long you practiced, the poses you did, how hard it felt, and any sore spots. This log will help you see how you’re improving and help you fine-tune your yoga routine.
Practice frequency is more important than how long you practice. Aim for three to five short sessions a week. Short daily sessions of 10–15 minutes can help you build a habit and improve your flexibility. Mix focused flexibility sessions with lighter flows or rest days to balance your practice.
As you get more flexible, you can gradually make your sessions longer and deeper. But always listen to your body and avoid pushing too hard. A careful approach to starting yoga will help you avoid injuries and build lasting flexibility.
| Focus | Typical Session Length | Frequency | Progress Measure |
|---|---|---|---|
| Gentle mobility and breath | 15–20 minutes | 3 times/week | Sit-and-reach improvement |
| Targeted hip and hamstring work | 20–30 minutes | 4 times/week | Deeper forward fold with flat back |
| Daily micro-practice | 10–15 minutes | Daily | Reduced morning stiffness |
| Progression and recovery | 20–30 minutes | Alternate with light recovery days | Increased comfortable range without pain |
Essential Precautions and Safety for New Practitioners
Starting yoga is exciting. Always remember safety to avoid injuries and make steady progress. Learning about common dangers and how to adjust helps you feel confident in your practice.

Common risks for beginners and how to avoid them
Don’t stretch too far too fast. Stop if you feel sharp pain. Use small bends in knees and elbows and breathe well to protect your body.
Bad posture can hurt your lower back. Learn to hinge your hips and keep your core tight in forward bends. This keeps your spine safe.
Shoulders and necks can get tense. Keep your shoulder blades back and neck long. Getting tired can make you lose form. Shorten your practice or do restorative poses when you’re tired.
Modifications and use of props to protect joints
Blocks can raise the floor for poses, easing pressure on your hamstrings and hips. Straps help you stretch your hamstrings without rounding your back. Bolsters and blankets support your spine in restorative poses.
Use a wall for balance in standing poses and for gentle backbends. A folded blanket under your knees or sit bones keeps your spine straight and eases joint pressure. These tools make yoga safe and comfortable for tight muscles.
When to consult a healthcare professional
Get advice if you’ve had recent surgery, osteoporosis, severe joint pain, a herniated disc, or sharp pain during yoga. Talk to a physical therapist or doctor who knows about muscles and joints. The Mayo Clinic and American Academy of Orthopaedic Surgeons are good resources.
Tell your yoga teacher about any health issues before class. Choose teachers who focus on alignment and therapy. Knowing when to see a doctor keeps your practice safe and helps your long-term health.
| Risk | Simple Prevention | Helpful Props |
|---|---|---|
| Overstretching and strains | Stop before sharp pain; use micro-bends; steady breath | Blocks, straps |
| Lower back strain | Practice hip-hinge; engage core in forward folds | Folded blanket under sit bones |
| Shoulder and neck tension | Keep shoulder blades stable; avoid collapsing | Bolster for supported poses |
| Balance-related falls | Use a wall; practice near a stable surface | Wall, block for steadiness |
| Fatigue-related form breakdown | Shorten session; choose restorative sequence | Bolster, blanket for support |
Warm-Ups and Stretching for Beginners
Start each practice with a short warm-up to reduce injury and boost mobility. Focus on movement that wakes the hips, spine, and shoulders. This way, you can get more from your yoga session. Aim for three to five minutes of gentle activity before holding any longer stretches.

Simple dynamic warm-ups to prepare the body
Begin with Cat-Cow to mobilize the spine and engage the core. Add gentle leg swings, standing or supine, to activate hip flexors and hamstrings. Shoulder circles and arm swings warm the shoulder girdle.
Include a low lunge with small pulses to wake the glutes and hip flexors. These dynamic warm-ups raise tissue temperature and prime joints for movement.
Gentle static stretches to increase range of motion
After warming up, use seated forward folds with bent knees or a strap-assisted hamstring stretch to target the back of the legs. Try reclined knee-to-chest for lower-back release and figure-four supine for glute and piriformis relief.
Hold static stretches 20–45 seconds at a mild, comfortable tension. Avoid bouncing. This approach to static stretches for beginners helps lengthen tissues safely after the body is warm.
Breathing techniques to enhance stretch response
Use diaphragmatic breathing to calm the nervous system and reduce muscle guarding. Practice long, slow exhalations as you settle deeper into a stretch. That rhythm encourages relaxation and better range of motion.
Ujjayi breath, the soft ocean sound, can support longer holds as you progress. People with respiratory issues should pace this breath carefully. Breath awareness improves proprioception and makes stretching for beginners more effective.
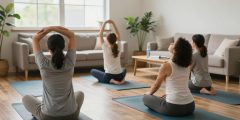
Basic Yoga Poses for Flexibility
Begin with simple poses that increase flexibility safely. These poses focus on proper alignment, slow movements, and breathing. Use blocks, straps, and bolsters for support when needed.

Standing poses for hips and hamstrings help open the back of the body. Downward-Facing Dog stretches the hamstrings and calves, and opens the spine.
Warrior II and Triangle Pose stretch the sides of the hips and hamstrings. Keep your pelvis neutral, hinge from the hips, and engage your core to protect your back.
Try Standing Forward Fold with a slight bend in the knees or a strap around your feet. This protects your hamstrings. Focus on bending at the hips, not rounding your back.
Seated poses for spine mobility target the lower and middle back. Start with Seated Forward Fold, using a strap and keeping your knees slightly bent if your hamstrings are tight.
Bound Angle Pose gently stretches the inner groin and hip joints. Sit on a folded blanket or use props under your knees for comfort and safety.
Include Supported Bridge and Reclined Twist for gentle spinal extension and rotation. A block under your sacrum in Bridge makes it a restorative pose that reduces strain.
Supine hamstring stretches with a strap focus on the back of your legs without putting pressure on your spine. Bend your other leg if you feel tension in your lower back.
Safe forward folds focus on lengthening your spine and bending at the hips. Move slowly on the exhale and stop if you feel sharp pain.
Gentle backbends for beginners emphasize small, even arcs. Sphinx and Cobra are low-load poses that teach spinal extension without harming your lower back discs.
Use a bolster or block under your chest for supported backbends. Work in short holds and breathe steadily with each lift to build strength and comfort over time.
Beginner Yoga Routine for Flexibility at Home
Begin with a simple plan you can follow every day. This helps you fit yoga into your busy schedule and improve flexibility. Use your breath and slow movements to protect your body while increasing mobility.

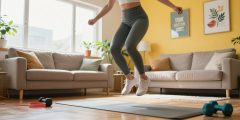
Short daily sequence for busy schedules
Try a 10–15 minute yoga sequence for daily mobility. Start with 1–2 minutes of breathing exercises. Then, do Cat-Cow and low lunges with twists.
Add Downward Dog and Runner’s Lunge for hamstrings. Finish with a seated figure-four for the hips. Remember, inhale to expand and exhale to soften.
This short flow trains your body to hold poses longer over time.
20–30 minute routine for focused flexibility training
For a focused session, start with a five-minute warm-up. Use gentle sun salutations or joint drills. Then, do a main sequence of 15–20 minutes.
Include standing hip-openers, hamstring stretches, and spine mobility. Try Warrior II and Triangle for hips, and standing fold for hamstrings. Add reclined twist and bridge for the spine.
Finish with a supported backbend like Sphinx or a gentle Bridge. Cool down with a restorative forward fold or legs-up-the-wall for three to five minutes.
Guidelines for progression and increasing intensity
Progress slowly over four to eight weeks. Start with 20–30 second holds and increase to 45–60 seconds as you get more comfortable. Gradually increase the session length from short sequences to 20–30 minute routines.
Introduce more challenging poses or reduce props as you get stronger. Add strength and balance exercises to support long-term flexibility. Always listen to your body and stop if you feel sharp pain. Rest sore tissues for 48 hours.
Common Challenges and How to Overcome Them
Starting a flexibility practice has its ups and downs. Tight hips and hamstrings can be tough. But, with the right approach, you can make progress without forcing it.

Dealing with tight muscles and limited range of motion
Start with shorter, more frequent sessions. This helps avoid feeling overwhelmed. Try dynamic warm-ups like leg swings before deeper poses.
Use foam rolling or myofascial release with active drills. Leg lifts and slow lunges build strength. Passive stretches help ease tension.
Be patient with your body’s tissues. Muscles adapt faster than fascia. Gentle, consistent effort leads to lasting flexibility gains.
Staying motivated: tips for consistency and habit building
Set small, achievable goals. Schedule sessions at the same time each day. Short practices fit into busy lives.
Reminders, apps, or classes help stay on track. Mix up your routine to keep things interesting. Focus on different areas like hamstrings and hips.
Celebrate small victories. Notice improvements like easier sitting or less morning stiffness. These small wins keep you motivated.
Tracking progress without forcing or comparing
Focus on personal, measurable goals. Track reach, squat depth, or pose alignment. Record numbers and take photos or videos to see progress.
Avoid comparing yourself to others. Everyone’s journey is different. Keep a journal to track your own progress and make adjustments as needed.
Keep a simple practice journal. Regular entries help track your progress over time. Focus on steady, safe improvement, not quick results.
Combining Flexibility with Strength: Balanced Practice
Flexibility without strength can make joints unstable and movement less efficient. A balanced practice combines mobility training with muscle strengthening. This prevents overcompensation and supports long-term flexibility gains, enhancing daily activities.

Why strength supports long-term flexibility gains
Strong muscles help control joints, reducing the risk of injury as flexibility grows. A strong posterior chain, hips, and core allow for better pose alignment and safer movement. Strength also prevents one muscle group from dominating, ensuring balanced movement for sports and everyday life.
Simple strength-building moves to pair with flexibility work
Include a few simple strength-building yoga moves in each session. Glute bridges and single-leg bridges strengthen the posterior chain and improve hip extension. Chair pose and Warrior II enhance quad and hip stability for safer lunges and folds. Planks and modified side planks support the core, easing forward bends and gentle backbends. Adding resistance band exercises for hip abductors and external rotators sharpens control.
Sample hybrid sequence for flexibility and strength
- Warm-up: dynamic mobility such as Cat-Cow and low lunges to prepare tissues.
- Strength phase: 2 rounds of 30–45 seconds plank, 12 glute bridges, and 8–10 chair squats.
- Flexibility phase: 45-second hamstring strap stretch, figure-four supine for external rotation, and a supported bridge to open the chest and hips.
- Cool-down: gentle supine twist and diaphragmatic breathing to calm the nervous system.
Beginners should start with manageable sets and mild holds. Gradually increase repetitions, add 10–20 second holds, or reduce prop assistance. Practicing a hybrid yoga sequence two to three times a week will improve mobility and control steadily without overloading tissues.
Resources: Classes, Apps, and Props for Beginners
Choosing the right classes is key to starting yoga. Look for classes that give clear instructions and offer modifications. They should start with short sessions and get longer as you get better. Choose teachers with Yoga Alliance credentials or experience in restorative yoga.
Read reviews and check out class descriptions before you sign up. If you need help with accessibility, find platforms with captions and slow cues.
Many people like yoga classes online because they’re easy to find and offer variety. Try out sample lessons to see if the teacher’s pace and tone work for you. Look for classes labeled as “gentle” or “flexibility-focused.” Make sure each week builds on the last.
Livestreams from local studios can give you the feel of being in class while staying safe at home.
Recommended props and why they matter
- Yoga blocks (foam or cork): raise the floor in standing and seated poses to protect hamstrings and hips.
- Straps: extend reach safely in seated forward folds and hamstring stretches to avoid overstretching.
- Bolsters or firm pillows: support gentle backbends and restorative poses to reduce spinal compression.
- Blankets: cushion knees, lift hips in seated work, and add gentle support in supine positions.
- Yoga wheel (optional): use only after building foundational strength and alignment.
Many resources say yoga props are key for beginners. They help you practice safely and correctly.
Top apps and channels to try
Look for yoga apps that let you customize your practice. Yoga With Adriene on YouTube is great for beginners. Down Dog offers tailored programs. Glo and Alo Moves have structured courses. DoYogaWithMe has donation-based lessons and different teachers. Try a few to find what works best for you.
| Resource Type | Recommended Options | Best For |
|---|---|---|
| Free YouTube Channels | Yoga With Adriene, SarahBethYoga | Accessible entry, short sessions, home practice |
| Customizable Apps | Down Dog, Glo | Personalized sequencing and progressive plans |
| Paid Platforms | Alo Moves, Glo | Structured courses, teacher variety, skill progression |
| Donation/Community | DoYogaWithMe, local studio livestreams | Flexible pricing, community classes, workshops |
| Essential Props | Blocks, straps, bolsters, blankets | Support alignment, reduce injury risk, aid flexibility |
When looking for yoga classes, focus on safety and clarity. Try out different teachers until you find one you like. Use basic props to help with flexibility and protect your joints. Regular practice with good teachers and apps will help you grow and enjoy yoga.
Conclusion
Flexibility is key for health and daily life. It makes movement easier, reduces stiffness, and helps maintain good posture. Yoga is a great way to boost flexibility, especially if you practice regularly and with care.
Starting with short, frequent sessions is a good idea. Warm up well and use your breath to stretch deeper. Using props like blocks and blankets can also help protect your joints. Setting achievable goals helps you track your progress.
Adding strength exercises to your flexibility routine is also important. It helps keep your flexibility and reduces the chance of injury.
For beginners, finding a beginner-friendly yoga class or app is a good first step. Get the basic props you need and commit to a 4–8 week plan. This will help you see improvements.
If you feel sharp pain, stop right away. Always check with a healthcare professional if you have any health concerns. Getting lessons from a certified instructor is always a plus.
Start with the routines and tips from this article. Keep an eye out for new updates and expert interviews on yoga and flexibility research.